Saturday, August 17, 2019

Three Variations on the Crane

Kotobuki Tsuru (Celebration Crane)
Houou (Pheonix)
Tsuru (Crane)
This project was a study on curved folding. No scoring (laser or hand) was used. Instead, curves were formed by creasing, then smoothing out bumps with a stylus (the tip of my mechanical pencil).

The Tsuru is not traditional. In order to create enough layers to shape, I made a 30 degree version of the traditional crane and added a diagonal graft. Crease pattern here: https://tinyurl.com/yypssxu9.

Houou and Kotobuki Tsuru are more or less folded from traditional bases.

All three birds are folded from tissue foil.

Which bird do you like the best?

Monday, August 12, 2019

Reflections on the State of Origami (Art vs. Craft)


More teeth, more scales, more fingers, more legs, more grid lines, more more more… origami is rapidly growing more and more complex. While origami’s development as a complex, intricate, mathematically precise craft, its development as an art is more difficult to spot. With an immense volume of models being published in books, magazines, and on the internet every year, innovative origami design techniques are constantly being created, yet the artistic identity of origami seems to be fairly static. For laymen, one origami artists’ style can be extremely difficult to distinguish from another.

Compared to a more mature art like painting, the origami scene lacks in diversity, recognition, and talent. Relatively speaking, origami has less diverse styles, is less recognized by the public, and has fewer talents that are recognized as masters than painting, sculpture, etc. At times, the focus on accuracy and complexity rather than expression makes one wonder, to what extent is origami an art rather than just a craft?

In answering this question, we must remember that origami is still extremely young.

Origami’s history as an art—as opposed to as a tradition—is fairly short. Until the 1950s with Akira Yoshizawa, origami was limited to cranes, boats, etc… what we now call “traditional models.” Compared to the millennia of history of painting, what origami has accomplished in less than a century is something to be proud of.

The rapid growth of origami in complexity is evidence of the youth of our art and community. We are still young; our artistic tradition is limited; we are still discovering the techniques of origami craft and design. Thus, our progress is expressed mostly in complexity. Picasso first had to first master traditional painting before developing the bold styles that we identify him with today. As origami as an art matures, we will see more unique artistic identities. More genuine masters will appear, and origami will gain recognition from outside of origami circles.

In fact, evidence of maturing style in origami can already be found. Meher McArthur’s book “New Expressions in Origami Art”, published 2017, features 25 very unique origami artists, including Joel Cooper’s masks, Vincent Floderer’s crumple folds, and Eric Joisel brilliantly expressive characters. Advertising and fashion have both frequently sought out origami for inspiration. Given time, origami will surely grow into a well recognized, well respected, diverse art form, that perhaps will rival even the world of painting.


This post is an expansion of my (Oliver Jiang's response to João Charrua’s comment on Nicolas Terry’s facebook post about “What is a Master in Origami?” Link here: https://www.facebook.com/nicolas.terry2/posts/10219522416553594

Sunday, December 23, 2018

Sonobe Balls

Recently, I acquired an obsession over Sonobe modulars. In my quest to find the perfect origami holiday gift, I came across the Sonobe ball. It’s easy but not effortless, it’s sturdy and won’t fall apart, and its simple beauty can be easily appreciated by non-origamists.
Figure 1: Stellated Octahedron: 12 Sonobe Units, 4 Pyramid Units

Figure 2: Stellated Icosahedron: 30 Sonobe Units, 10 Pyramid Units
I usually prefer more “complex” origami, but Sonobe balls, as simple as they seem, have complexities too. The standard Sonobe ball with outward pointing pyramids was cool and all, but what happens if you invert the pyramids?
Figure 3: Inverted Stellated Icosahedron: 30 Sonobe Units, 10 Pyramid Units

It works, but a couple challenges arise. First, when inverted, the pockets for assembling the Sonobe ball move from the outside to the inside of the ball, which makes assembly of the final unit considerably more difficult. A quick modification to each individual unit will reverse the pockets back to the outside again, but I opted to stick with traditional unit.
Figure 3: Zoom on Figure 4. Look at this ugly hole.
The bigger problem is that the inverted ball looks ugly, as the thing is full of awkward holes. Of course, these holes were partially caused by my hasty folding, but I’m more concerned about the theoretical change in the way the ball is held together. In all modular models, units “want” to fall out of their pocket (some refer to the pockets as locks). Friction helps prevent the unit from falling out, but the main force holding a unit in place is its cohesion the rest of the units. If we imagine the falling out of each piece to be a force vector, the sum of all of the force vector in a modular origami model is zero. Each unit might want to fall out due to its own force vector, but its own force vector helps keep its neighboring units in place.
Figure 5: uninverted Sonobe ball with “force vectors”
Now, if we look at the inverted Sonobe ball with this force vector model (Figure 5), it quickly becomes clear why it has big, ugly holes when its uninverted sibling doesn’t. First, we can notice that although Sonobe balls are made with Sonobe units, they can also to be seen as made up of many “pyramid units”, where each pyramid unit is formed by three Sonobe units. Then, when we look at the holes where pyramid units intersect, it can be seen that, in the uninverted Sonobe ball, the force vector point towards the hole. In other words, they actively “try” to close the hole. On the other hand, the force vector in the inverted Sonobe ball point away from the hole, so they actively “try” to make the hole bigger.
Figure 6: inverted Sonobe ball with “force vectors”
I never actually got around to solving this problem for the inverted Sonobe ball. Better paper and more careful construction could probably do the trick, but a modification in design sure would be cool. The “force vector model” isn’t only useful for Sonobe balls, it can be applied to other modular origami as well. I have never come across anybody describing modular origami in this way, so I hope you will find it useful in your own modular origami adventures.

Saturday, August 4, 2018

Mushrooms and Jellyfish

Back in May, I came up with a Mushroom design.
The big mushroom is folded from printer paper, and the small ones are from the bottom pad of a pack of post-its.
It was a very simple design: sink the big tip of an off-center frog base, then hide the excess flaps. I'm very surprised that I've never come across any similar designs. I'm very happy with how the mushrooms came out.

Then I thought, why hide the excess flaps? Is there any way I could use them? Jellyfish have domes like mushrooms, but have lots of tentacles; could I modify my mushroom into a jellyfish?

My first attempt had four long tentacles and four tiny ones.

Please forgive the quality; I fished some of these folds out of storage bins of forgotten folds.
It was folded by sinking a frog base. The small tentacles were barely visible, and the remaining long tentacles seemed too few to be believable.

My next attempt had eight equally long tentacles.
This one was fished out of a storage bin too, please forgive the quality.
The base for this was a "merged" crane base. Essentially, there was four crane bases on one square: one in each quadrant. However, because all of the tentacles were the same length, it was easy for the inner tentacles to hide behind outer ones.

Finally, I arrived at a design I was happy with.
Folded from untreated tissue paper.
This version used a merged crane base as well. However, in order to lengthen the inner tentacles, I added a graft along the four sides of the square. This design had just the right size and number of tentacles in my eyes.
https://upload.wikimedia.org/wikipedia/commons/4/44/Jelly_cc11.jpg

Wednesday, June 13, 2018

An Ode to the Origami Community

A couple weeks ago, the Exploring Origami Club at Foothill High School folded and mailed twenty-one cranes to Rick Allred, the man behind the In the Folds of Peace Project. Allred is trying to collect a million cranes from around the world and escort them all to the Hiroshima Peace Memorial as a symbol of wishes of peace from all over the world.

To receive a million cranes from thousands of people and organizations from around world--and then escort a million cranes on a journey halfway across the globe--must require, in the project's Indiegogo page's words, a "logistical miracle." Yet, while creating this logistical miracle, Allred found time to personally hand-write a postcard to our club at FHS. This was very touching, especially because he probably wrote back to the thousands of other contributors who folded cranes as well.

To me, Allred's enormous project and his little act of gratitude exemplify what is so awesome about the origami community. With few exceptions, wherever you find origami, you will find kindness and respect for others. The Origami Forum is full of people sharing their own folds and the folds of their favorite artists, people giving compliments and giving constructive criticism, and people asking for help and giving great advice. On the OrigamiUSA mailing list, people are constantly sharing the latest news in the origami world; people cheer together upon learning of new advancements origami gave to science, and people mourn together upon learning of the passing of one of their folder friends. There are plenty of other online origami communities, but I'm sure that all of them are as awesome and wholesome as the ones I've seen.

All that is awesome about online origami communities is true about IRL origami communities. All of the great things folders can do online, they can do at origami clubs and origami conventions around the world. In fact, there is at least one additional benefit of folding origami with others in person: you form strong bonds and friendships that you couldn't form behind a computer screen.

To the entire origami community, thank you so much for being so awesome.


Tuesday, January 2, 2018

LET GO


This is a piece about the beauty in letting go. This is not origami--there is a single cut. However, by letting go of the rules of origami, I am able send another message. The cut separates the man from the bird. They are separate, but a sliver of uncut paper holds them together. The man is in the middle of a decision, will he cling onto this bird that wants to fly away, or will he let go? Will he spend his life forcing something that is not meant to be, or will he free the bird and, by corollary, himself?
Be it a dream, a right, or a person, we keep chasing what we want. We are told to never give up, but, sometimes, we must realize that giving up is the only way to gain freedom.
Countless people have spoken on how they kept chasing their dreams and ended up making it. Who we don't hear from, are the people who tried, but had to give up on, only to find something better.
We are constantly reminded of the importance of defending our rights. While they are extrememly important, we must remember that we are only able to live in this land of liberty because each and every one of us gave up a little of our rights.
Maybe, your heart tells you to keep chasing that person you find so beautiful, so attractive. However, sometimes, the circumstances just don't work in your favor. Sometimes, you just need to let go of what you want in order to find what you need.
But only sometimes. Keep chasing what you want, but don't get blinded by the light.

Saturday, October 7, 2017

Miura's Not-So-Space Ship

In August, I made this modification of Edu Solano Lumbreras' ship design to have a collapsible sail.

Please pardon the poor lighting.
The design of the sail is based of the Miura-Ori fold (aka the best way to fold a map), which astrophysicist Koryo Miura applied on a japanese spacecraft (hence the title).

the Miura-Ori fold (credit: British Origami Society)
I initially designed this model while studying the mathematics of folding at Harvard, but I was not happy with how to sail expanded up-down instead of out-in. This new version opens up correctly. 🙂

I'm really proud of this design; I think it's a really cool application of the Miura-Ori fold.

Tuesday, August 8, 2017

Treemaker Troubles

I spent the last two weeks studying the Mathematics of Origami at Harvard. There, I made many great friends, saw many new things, and learned about concepts that I had never heard about before. However, this post will be about my final project.

Treemaker is very helpful because it does all the math for you—until it does not. For my final project, I wanted to use treemaker to help me design an evangelion (eva) [1.0] from the anime “Neon Genesis Evangelion.” Basically, a giant robot. I was ultimately unsuccessful, but the project taught me a great deal about the challenges and conveniences of applying math to artistic design.
1.0 an Evangelion

I started this project knowing a little background about treemaker. I knew that people rarely use treemaker to design origami models, but use it to do “rapid prototyping” instead. Rapid prototyping is exactly what it sounds like: rapidly going through different prototypes to see what works and what doesn’t. I was unsure of why treemaker was so unpopular for artistic design, but after a series of not-so-rapid prototyping, I understood why.

I also knew that treemaker was terrible for box pleats, so details like fingers and the face would be difficult. However, I could get around that by using strip grafts after the basic structure was created in treemaker. Strip grafting is a technique that inserts detail without affecting the rest of the model’s structure. The diagram [2] below shows an example of how strip grafting is done.
2.0 a strip graft example from Robert Lang’s Origami Design Secrets (ODS)

My decision to use strip grafting to create fingers have two weak conditions (these conditions can be ignored, but you will be ignoring elegance as well):
  1. the arm flaps are on the edge/corner of the paper
  2. there is few other flaps blocking the path connecting the arm flaps. (only applies if arms aren’t made from corners) [2.1]
2.1 Node 4 is bad because it is in between the arm flaps, which interferes with strip grafting

After going through a series of not-so-rapid prototypes, I understood why treemaker is limited to prototyping. After burning through eight different prototypes, I found only one pattern that I liked [3.0]. The rest were discarded due to paper inefficiency (circles do not cover much of the paper), inconvenient arrangement of flaps (, inelegant molecules, strip graft conditions, etc.), and inappropriate width of flaps (translates to extreme thickness in folded version.

3.0 attempt #4
Although the flap lengths and arrangement is what I wanted, the angles between folds are irregular. This means that the flaps will not line up in the folded result, and that the folding process is difficult because you must first locate all the points. However, I noticed that all the angles were very close to multiples of 30o, so I decided to try that [3.1].
3.1 More equations than variables? Uh oh..
Treemaker seems to struggle when I ask it to use nice angles, so I decided to create the nice angles by hand in another program: Oripa [4.0]. Oripa doesn’t do any complicated math for me, but provides me with tools to draw crease patterns like angle bisector and orthogonal measurements.
Oripa is nice
That’s a really clean crease pattern! What happens when we fold it?
side view
front view
The result is very close to the structure we want. However, the model has no torso. I decided to strip graft on paper for the torso. This however, proved difficult, because there were flaps in the way of the area I wanted to strip graft.

That is all that I managed to finish. After all my experiments with treemaker, I have come to the conclusion that it is unwieldy because it is only good at dealing with flap lengths and locations. Other variables such as symmetry and angle measures add too much complexity for treemaker to solve nicely. This makes it very nice to quickly confirm or reject a prototype, but less so when trying to create an aesthetically pleasing model.

Thursday, June 8, 2017

Origami PogChamp

If you ask any twitch.tv frequenter what the most iconic part of twitch is, they'll tell you that it is the emotes. The little faces are used by twitch chatters millions of times a day. The popularity of the emotes can partially be attributed to their ability to express facial and intonation cues through text.

like so...

Recently, I have also become incredibly interested in faces. Just like the twitch chatters who use tiny little faces to express their feelings, I've been trying to communicate through origami masks.

Notice that I said I am "trying to communicate through the masks. I'm still learning the skills to be able to create accurately the faces I imagine, and to be honest, there hasn't been many feelings recently I want to express. 


This is the first mask I folded. It's pretty generic, and I folded it mostly because I really, really wanted to fold a mask. Either way, I like it.


I finished this Viking face yesterday. The eyes are covered as a reference to tf2's tyrant's helm. Despite the extra creases in the beard (they're there because I folded it over a course of a few weeks), I'm very proud of the beard. Still, the beard is far more complex than the face, and overall, it is not balanced.

Meh, that's it. Expect more masks and faces and things in the future. Cya.


Tuesday, March 21, 2017

Curvy Cow

Two days ago, I set aside several hours of my time and folded Stephan Weber's bull. I wanted to try wet folding it using watercolor paper because it is strong and comes in large sheets. However, because watercolor paper is produced for painters, it only comes in white, which can be bland for origamists.

"How do I add some flavor to watercolor paper," I thought, "Why not color it with some watercolor?" At the time, I thought it would be a great idea, so I stopped by an art supply shop to pick up watercolor paper and paint. I'll bet that the cashier thought I was a painter although I've never pursued painting by myself (I've taken classes before).

After getting home, I spent about an hour and a half painting the front and back sides of the paper. I chose to have one side reddish black and the other side bronze (for the horns), although I varied the pattern from place to place.


Everything was going well with the watercolor idea until I started folding. Because I wanted to wetfold the bull to shape it well, I needed to wet the paper throughout the folding process. Quickly, I realized that adding water to a watercolor painting makes the color come off. It was not that disastrous though, as most of the color was permanent. In fact, it was kinda cool to be able to adjust the color of the paper as I folded. In the end, the bull's color turned kinda pinkish, almost like a medium steak. The horns and tail grew muddier as the black from one side of the paper moved to the other side. Overall, I am happy with the way it turned out.


I think the really cool thing about this is that it combined two art forms in one project. Not only did I use my preferred medium of origami, but I also relived some childhood memories of watercoloring and painting. Although the process wasn't perfect, I would definitely try it again.

Saturday, October 29, 2016

FHS Origami Club Folds Brontosaurs

Last month, Foothill High School's Exploring Origami Club had their first meeting. We are a little group of about fifteen people, with folders of various skill levels. I taught everyone how to fold Samuel Randlett's Brontosaurus. As a club, we folded and mailed many little brontos to New York, where they will be a few of many other brontos hung up on the Holiday Tree at the American Museum of Natural History.
Here are a few of them. As you can see, quality varies from model to model.

Unfortunately, we did not count the brontos before we mailed them off. Regardless, I am sure that they will make a contribution to the festivity of the Holiday Tree.

Thursday, August 4, 2016

Fold Elephants!

OrigamiUSA and the 96Elephants Wildlife Conservation Society are partnering in attempt to break the Guinness world record for the "largest display of origami elephants". Currently, the record is 33,764. Together, we can try to fold more than 35,000, the number of African Elephants killed for ivory each year. You can find more about this, and also elephant folding instructions, here.

Interestingly enough, one of the first exhibits devoted to origami was also entirely devoted to elephants. In 1988, Alain Georgeot set up an exhibit of 88 elephants. 88 elephants was impressive already, just imagine 35,000!

The number sure is big, but it's not unachieveable. People from across the globe will work together to meet the goal. The deadline is September 16, so there is also plenty of time. The deadline is well after school starts, so you can get your friends, classmates, and teachers to help as well. I've already folded three. Two are designed by Richard Alexander from the Origamido studio, the instructions for which can be found through the link I provided above. Another is the one-crease-elephant designed by David Mitchell (not sure if this one will be counted). I plan to fold other elephants as well. Even if all you can contribute is one elephant, that would be great.


Sunday, May 15, 2016

New Model

     Yesterday, I finished folding Ekaterina Lukasheva's Flora. It was my first attempt at a 3D modular model. It wasn't too hard until the last of the thirty pieces, when it became slightly frustrating to work with. Nevertheless, I had a great time folding it.

Flora
     Recently, I also folded a modular Flower designed by Fumie Ono. Interestingly enough, each of the pieces is actually a traditional pig. The diagrams called for 20 pieces, but I used 21, as the model kept falling apart if I used less. I strung it up on a string trying to achieve a sun-like effect.

Flower

That's it for today.

Friday, March 25, 2016

New Origami Designs

     Recently, I designed two more origami models, a dragon and a statue of liberty. I plan to submit these to OrigamiUSA's Origami by Children (OBC) gallery, which you can check out here. I've written about OBC quite a bit in the past, so I won't be going on extensively here. Basically, OBC is a gallery of origami models folded by children of 18 years or younger. They usually select around 50 models from worldwide. It is all in all a great gallery, and I encourage you to check it out, be it online or at an exhibition.

     The first model I folded was a dragon of my own design. It's similar to another dragon I made before, but I made a few changes. The first version was created from a bird base that had been strip grafted down the diagonal. The second version was still made from a strip grafted bird base, but this time, two sides of the paper had been strip grafted as well.
Dragon 1.0
Dragon 2.0
     The result of the extra strip grafting is the second version has large wings, and a longer tail, which allows for more details.

    The other model I designed, a statue of liberty, is made from box pleats. It has a color change effect in it's design, but unfortunately, I don't have double backed paper of the colors I want right now. So that's why the entire model is green. When I was folded it for the first time (and only) time, I screwed up the proportions, so the pedestal is larger than it should be.
Statue of Liberty
    That's it for today, see you next time!

Sunday, December 20, 2015

Late Update on OBC 2015

     Once again, I must apologize for updating so late after the event had happened. I had been extremely busy with school work and marching band. Marching band is over now, and I'm back with another post.

     A couple month's ago, I submitted a model to OrigamiUSA's 2015 Origami by Children gallery. My model, a violinist of my own design, was one of the 54 models selected worldwide. You can find the 2015 OBC page here, and my model here

     Here is a picture of the violinist. Personally, I thought that the photographer should have taken the photo at a higher angle, but she did a good job.

That's all I have for today. See you next time. I'll try my best to update more regularily.

Saturday, September 27, 2014

Origami USA - Origami By Children

OrigamiUSA - OBC Gallery


First I will apologize for writing this article so late after the event. This is about my success in having my model to be selected as one of the 52 models worldwide for the Origami by Children(OBC) Gallery.


I decided to give it a shot after I received an award at the Origami Palooza 2013 at San Francisco JapanTown. I entered Satoshi Kamiya’s famous Divine Dragon, and I won a prize for “Complexity”. You can find that blog post here. Soon after, I submitted one of my own designs, the Mounted Knight, for OBC. This year's models can be found here.


I designed this model by using traditional bases and altering it to work for my model. I combined two bases: the frog base and the bird base. From this, I split flaps, sinked flaps, and created the model.


Origami USA is a non-profit, and volunteer based organization that is devoted to origami. Every year, the host the largest origami convention in the world, OBC being one of the galleries in it. The Paper, their magazine, says, "OrigamiUSA's mission is to share the joy and appreciation of paperfolding, preserve its history, nurture its growth, bring people together, and encourage community among paperfolders." You can find their website here.


When I received the letter informing me that I my model had been selected, I had some mixed feelings. I didn’t feel surprised, because I was confident that my model had been good enough to be selected. I also felt happy mainly because of the year-long membership that came with it.


OrigamiUSA membership gives me two origami magazine subscriptions, The Paper and The Fold. Also, I get discounts when buying stuff at the Origami Source. I can use the Lending Library, which pretty much means I can borrow books from people, and I can do a lot of stuff others cannot.

This success has inspired me to keep working hard on origami. Also, I am extremely happy and proud, and have been enjoying membership benefits. I will continue to innovate, and of course, brag to all my friends about it.

Saturday, September 14, 2013

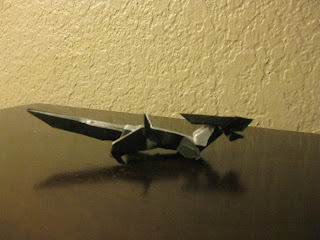
Origami Alien Version 2.0

     Last Week, I had designed a new origami model. My friend, also an origami enthusiast, told me that my first origami alien's major downside was that it couldn't stand. Here is a picture of it:

 I thought this might be due to the short and puny hind legs. In order to fix this problem. I decided that if I incorporated less paper to the head, and more to the legs they can be longer. So instead of using paper of 1/4n^2, I used 1/9n^2, where n is the side length.
Along the way, I discovered, that by making some changes, I could add toes. The front arms become smaller, but by using a trick I discovered, I can make them a bit longer. The body is also too long, so I shortened it by making three pleats, which shortens the model, adds detail, and allows the model to be curved. So the finished result looks like this:


I think it's pretty good. The lighting in the photo is bad, so the arms isn't so clear. For this model, I used metallic shadow paper, I do not know what type of fibers/technique this paper is. Most people who I tell them that I designed it, they say either that I am lying, or I used a computer. Those people don't know me so well. 

Thank you for taking your time to read this, or taking your time to skip the boring parts, and thank you for staring in awe at the picture and not believing that I designed it. Thank you very much.


Friday, August 16, 2013

Origami Pazoola


     I went to the first annual Origami Palooza. I entered two origami's into the competition. One was the Divine Dragon designed by Satoshi Kamiya, and the other was Alien Creature, designed by me. See a picture of it here: Alien Creature.


     First thing I did when I got there was fill out two forms and turn in my models for the contest. Then I wandered around the instruction tables. Everything there was either something I made before, or something I can learn just by looking at it, so I decided to get a sheet of paper and doodle (fold randomly, not draw). Later, they announced the winners. After what seemed like, two minutes, I heard my name. They had a hard time finding my model on the table, so I had to help them. Turns out, my Divine Dragon won me an award for complexity. I got a book with nothing complex inside. Later on, I discovered that they had mixed up the prizes, and I was suppose to have gotten a thirteen and three fourths inch square paper, but since they ran out of that, I kept my book and got a fifteen centimeter square paper. I still wish I had the bigger paper, since I couldn't make much out of fifteen centimeters.


     Anyway, I had a pretty good time and won about ten dollars, so I was pretty happy.

Saturday, April 27, 2013

My Origami Recent Designs

     Recently, I have designed quite a few new origami models. I have recognized that I am increasing in skill with box-pleating. Here are the models in chronological order.
Two Headed Dragon:

This model was designed by me and my friend: Ehong Kuo. I made the base in 4th grade (2011), and in 6th grade, Ehong and I added some details, such as the head, which was a great improvement. Also, we added a rider, who sits on the top.


Great Dragon:

I made this model in 5th grade, and I'm guessing you're wondering why I called it the Great Dragon. To me, it looks like it's looking down on everybody.


Alien Creature:

I consider this one of my masterpieces. This model's crease pattern is somewhat similar to Kade Chan's Fiery Dragon. The CP of the Fiery Dragon can be seen on the top corner of the Alien Creature. I made this in recently in 6th grade.


Dracula:

This is also a recent model. This model shows my improvement in box pleating. I have made another version, by splitting the jaw into three flaps, creating two fangs and a smaller jaw.


Human:

This is my favorite model. I made this only a month ago, and I am very proud of it. It is detailed, even with pockets. You can see box pleating in this one too.